Discovering a raccoon has made itself at home in your living space can be both frustrating and concerning. These clever creatures are known for their adaptability and survival instincts, but they can cause significant damage to your property and pose health risks due to the diseases they carry.
If you’ve detected signs of raccoon presence—such as unusual noises, droppings, or property damage—it’s crucial to act swiftly and decisively. This comprehensive guide is designed to arm you with the knowledge and tools you need to remove raccoons from different parts of your home, from the attic to the garden. By understanding the challenges and tools required for each scenario, you can reclaim your space and restore peace of mind.
Understanding Raccoons
Raccoons are wild animals native to North America and are considered common pests in urban and suburban areas. Known for their strong sense of smell and dexterity, raccoons are opportunistic animals that are always in search of food, making them a frequent visitor to garbage bins and pet food containers.
Raccoon activity often peaks at night as they are nocturnal animals, which means they are most active during the dark hours. This behavior often leads them to rummage through trash cans and pet food bowls, searching for accessible food sources.
Raccoons are notorious for leaving a trail of raccoon tracks and raccoon droppings wherever they go, making it easier to identify their presence. Raccoon feces can contain raccoon roundworm eggs, a parasite that poses significant health risks to humans and pets.
Understanding the raccoon population in your area can help in planning the removal and prevention process. Female raccoons, or mother raccoons, often seek out safe and warm places to nest and give birth to baby raccoons. These places include hollow trees, attics, and garages.
Knowing the signs of raccoons, such as raccoon tracks, raccoon droppings, and aggressive raccoons, can help in identifying a raccoon invasion and potential risks involved.
Removing Raccoons from Different Locations
After gaining a basic understanding of raccoons and their habits, it’s time to delve into the nitty-gritty: how to effectively remove them from various parts of your property. Each location presents its unique set of challenges, from the tools required to the specific steps you’ll need to follow. Whether these critters have made a home in your attic or are rummaging through your garage, this section aims to equip you with practical know-how to deal with each situation. Follow along as we dissect the challenges and solutions for raccoon removal in different locations.

Removing Raccoons from Chimneys
Estimated Cost
The cost for removing raccoons from your chimney can vary based on several factors. If you decide to do it yourself, there will be a cost associated with the essential supplies and tools required. However, if you choose to hire a professional, the cost will depend on the complexity of the job.
Factors that could affect the price include the number of raccoons, the location of the nest, the height of the chimney, and the need for any repairs to the chimney. To get a personalized quote for your specific situation, contact AAAC Wildlife Removal.
Prep Time: 30 minutes
This includes the time taken to gather all the essential supplies and tools, and preparing the work area by laying out a drop cloth in front of the fireplace and removing items that may get damaged or soiled.
Perform Time: 1 – 2 hours
This is the estimated time it will take to set the trap, remove the female raccoon, and then remove the young ones.
Total Time: 1.5 – 2.5 hours
This is the total estimated time from preparing the work area to completing the raccoon removal process.
Essential Supplies
- Drop Cloth: To protect the floor in front of the fireplace from dust, debris, and soot.
- Propane Torch: Used to create an updraft in the chimney to reduce dust and debris falling into the living area.
- Respirator: To protect yourself from inhaling dust and debris.
- Goggles: To protect your eyes from dust and debris.
- Mirror: To check for the presence of young raccoons in the chimney.
- Raccoon Cage: A secure cage to place the young raccoons in once they are removed from the chimney.
- Thick Leather Gloves: To protect your hands when handling the young raccoons.
- Tin Snips: May be needed to cut the head off a rusted or stuck cotter pin.
- Eye Protection: To protect your eyes from dust and debris.
- Assorted Cotter Pins: To replace the cotter pin removed from the damper.
- Lighter: To light the propane torch.
Tools
- Chim-Trap® or No-See-Um Chimney Trap: Specialized traps designed to capture raccoons in chimneys.
- Modified Chimney Brush: A chimney brush modified to encourage the female raccoon to enter the trap.
- Screwdriver: May be needed to remove or replace the damper.
- Pliers or Vice-Grips: May be needed to remove or replace the damper.
- Hammer: May be needed to remove a rusted or stuck damper.
Challenges
The main challenges faced when removing raccoons from the chimney include:
- Working at Heights: Setting the trap and removing the raccoons requires working at heights, which can be dangerous without the proper safety equipment and precautions.
- Securing the Female: The female raccoon must be secured without harming her or the young ones.
- Confirming the Presence of Young: It can be challenging to confirm the presence of the young ones and carefully remove them from the chimney.
- Avoiding Dust and Debris: There is a risk of releasing dust and debris into the living area when working inside the chimney.
- Prepare the Work Area:
- Lay out the drop cloth in front of the fireplace and remove items that may get damaged or soiled. This will help contain any dust and debris that falls down the chimney.
- Set the Trap:
- Secure the Chim-Trap® on the flue using bungee cords or cables. If using the No-See-Um Chimney Trap, place it inside the flue so it is out of view from the public.
- Create an Updraft:
- Light the propane torch to create an updraft in the chimney. This will help reduce dust and debris falling into the living area.
- Open the Damper:
- Open the damper slightly, about 1/4 inch, and use your mirror to confirm the presence of the young raccoons.
- Remove the Young:
- Carefully grab each of the young raccoons in turn and place them in the raccoon cage.
- Handle them carefully despite their screeching. Thick leather gloves will provide enough protection as the young are not developed enough to bite with any real force.
- Remove the Damper:
- If you cannot get all the young, you may need to remove the damper. Straighten the cotter pin and try to pull it out. If it is too rusted or difficult to move, cut the head off and remove.
- Be careful as soot may fall down into the fireplace area when the damper is removed. Remove the remaining young and replace the damper with a new cotter pin.
- Confirm that the damper is working properly.
- Advise on Chimney Inspection:
- Instruct clients to have the chimney inspected for damage.
- If the fireplace flue and chimney are in proper working order, advise them to have a fire to sterilize the chimney and fireplace area.
- The fire should continue for 2 to 4 hours, and they should not leave the home during this process.

Removing Raccoons from Attics
Estimated Cost
The cost for removing raccoons from your attic can differ based on several factors. If you opt to do it yourself, there will be costs associated with the essential supplies and tools required. However, if you choose to hire a professional, the cost will depend on the complexity of the job. Factors that could affect the price include the number of raccoons, the location of the nest, the accessibility of the attic, and the need for any repairs or cleaning after the removal. For a personalized quote tailored to your specific situation, contact AAAC Wildlife Removal.
Prep Time: 30 minutes
This includes the time taken to gather all the essential supplies and tools, and preparing the work area by removing any items that may obstruct the removal process.
Perform Time: 1 – 2 hours
This is the estimated time it will take to set the trap, remove the female raccoon, and then remove the young ones.
Total Time: 1.5 – 2.5 hours
This is the total estimated time from preparing the work area to completing the raccoon removal process.
Essential Supplies
- Thick Leather Gloves: To protect your hands when handling the raccoons.
- Respirator: To protect yourself from inhaling dust and debris.
- Goggles: To protect your eyes from dust and debris.
- Raccoon Cage: A secure cage to place the raccoons in once they are removed from the attic.
- Flashlight: To illuminate dark areas in the attic.
- Trash Bags: For cleaning up raccoon feces and any other debris.
Tools
- Raccoon Trap: A trap specifically designed for capturing raccoons.
Challenges
The main challenges faced when removing raccoons from the attic include:
- Access: Attics can often be difficult to access and move around in, especially if there are a lot of stored items, making it challenging to locate and remove the raccoons.
- Securing the Female: The female raccoon must be secured without harming her or the young ones.
- Locating the Young: Young raccoons may be hidden in difficult-to-reach areas of the attic.
- Dealing with Feces and Debris: Raccoons in the attic often result in a significant amount of feces and debris that needs to be cleaned up.
Step-by-Step Guide
- Prepare the Work Area:
- Remove any items from the attic that may obstruct the removal process, such as boxes, furniture, or other stored items.
- Create as much space as possible to maneuver and safely remove the raccoons.
- Set the Trap:
- Place the raccoon trap in a location where the raccoons are known to be active, such as near the entry point or near signs of raccoon activity like feces or nesting material.
- Bait the trap with something that will attract the raccoons, such as marshmallows or cat food.
- Wait for the Raccoon to Enter the Trap:
- Monitor the trap and wait for the raccoon to enter. This may take some time, so be patient.
- Check the trap at regular intervals, but avoid disturbing the area too much as this may deter the raccoons from entering the trap.
- Remove the Raccoon:
- Once the raccoon is trapped, carefully remove the trap from the attic and place it in a secure location.
- If there are multiple raccoons, you may need to repeat the trapping process until all the raccoons have been removed.
- Locate and Remove the Young:
- Search the attic carefully for the young raccoons. They may be hidden in difficult-to-reach areas, such as in the insulation, behind walls, or under the eaves, so be thorough.
- Once located, carefully place them in the raccoon cage without handling them directly.
- Clean the Area:
- Clean up any raccoon feces and other debris in the attic using a disinfectant cleaner to remove harmful bacteria and parasites.
- Remove and replace any contaminated insulation material.
- Seal Entry Points:
- Inspect the attic for any holes or cracks that the raccoons may have used to enter.
- Repair any damages and reinforce any weak points to prevent raccoons from returning.
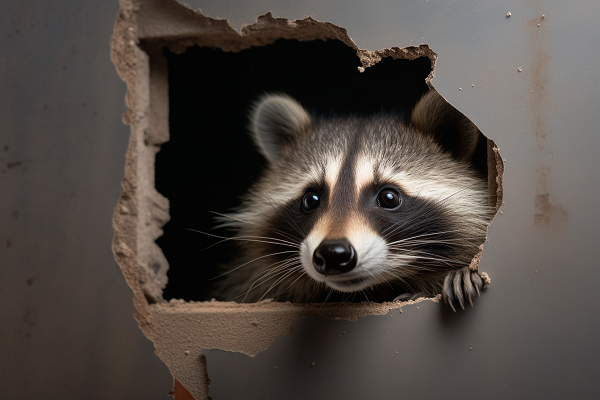
Removing Raccoons from Walls
Estimated Cost
Removing raccoons from the walls of your home involves several variables that can affect the overall cost. Should you choose to tackle the task yourself, the expenses will be related to the essential supplies and tools necessary for the job. Conversely, if you decide to engage a professional, the cost will be influenced by various aspects of the task. These may include the number of raccoons, the position of the nest, the structural details of the walls, and any required repairs or sanitization post-removal. To receive a quote customized to your particular circumstances, reach out to AAAC Wildlife Removal.
Prep Time: 30 minutes
This includes the time taken to gather all the essential supplies and tools, and preparing the work area by removing any items that may obstruct the removal process.
Perform Time: 1 – 3 hours
This is the estimated time it will take to locate the raccoons, make a hole in the wall, remove the raccoons, and then patch up the wall.
Total Time: 1.5 – 3.5 hours
This is the total estimated time from preparing the work area to completing the raccoon removal process and patching up the wall.
Essential Supplies
- Thick Leather Gloves: To protect your hands when handling the raccoons.
- Respirator: To protect yourself from inhaling dust and debris.
- Goggles: To protect your eyes from dust and debris.
- Raccoon Cage: A secure cage to place the raccoons in once they are removed from the wall.
- Trash Bags: For cleaning up raccoon feces and any other debris.
Tools
- Drywall Saw: To make a hole in the wall to access the raccoons.
- Stud Finder: To locate the studs in the wall and avoid cutting through them.
- Flashlight: To illuminate dark areas inside the wall.
Challenges
The main challenges faced when removing raccoons from walls include:
- Locating the Raccoons: It can be difficult to determine exactly where the raccoons are located within the wall.
- Making a Hole in the Wall: Making a hole in the wall to access the raccoons can be challenging, especially if you have never done it before.
- Handling Aggressive Raccoons in Confined Spaces: The close confines of the wall space can make raccoons feel cornered and they may become aggressive, making it challenging to safely handle them.
- Repairing the Wall: After the raccoons are removed, the hole in the wall will need to be patched up, which can be difficult if you do not have experience with home repairs.
Step-by-Step Guide
- Locate the Raccoons:
- Raccoons are nocturnal creatures and are most active during the night. Use a flashlight and listen carefully for sounds like scratching, squeaking, or rustling.
- Experts can use thermal imaging cameras to detect the heat signatures of the raccoons, making it easier to pinpoint their exact location.
- Prepare the Work Area:
- Remove any items from the area that may obstruct the removal process, such as furniture, decorations, and wall hangings.
- Make a Hole in the Wall:
- Use a drywall saw and a stud finder to carefully make a hole in the wall where the raccoons are located.
- Make sure to cut between the studs to avoid damaging the structural integrity of the wall.
- Remove the Raccoons:
- Carefully remove the raccoons from the wall and place them in a raccoon cage.
- Make sure to wear thick gloves and long sleeves to protect yourself from scratches and bites.
- Clean the Area:
- Clean up any raccoon feces, urine, and other debris inside the wall using a disinfectant cleaner to remove any harmful bacteria and parasites.
- Patch Up the Wall:
- Use drywall and joint compound to patch up the hole in the wall.
- Sand the area smooth and paint it to match the rest of the wall.
- Seal Entry Points:
- Inspect the outside of your house for any holes or cracks that the raccoons may have used to enter.
- Seal these entry points using steel mesh or hardware cloth to prevent raccoons from returning.
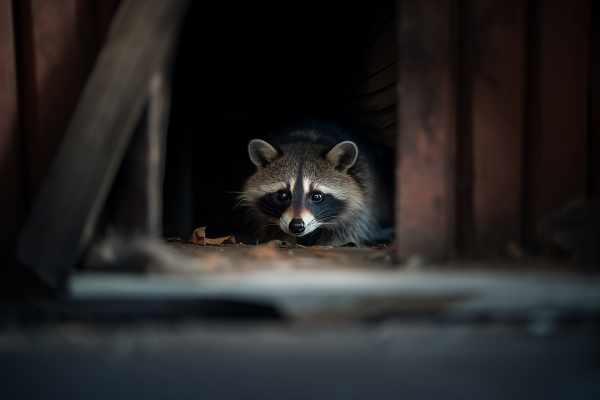
Removing Raccoons from Crawl Spaces
Estimated Cost
The price of raccoon removal from crawl spaces can fluctuate based on a number of considerations. Taking on the job yourself will incur costs for essential supplies and tools. If you opt for a professional service, the price will be determined by several factors, such as the number of raccoons present, the location of the nest, the accessibility of the crawl space, and any necessary repairs or cleaning afterward. To obtain a detailed quote specific to your situation, contact AAAC Wildlife Removal.
Prep Time: 30 minutes
This includes the time taken to gather all the essential supplies and tools, and preparing the work area by removing any items that may obstruct the removal process.
Perform Time: 1 – 3 hours
This is the estimated time it will take to locate the raccoons, remove them from the crawlspace, and clean up the area.
Total Time: 1.5 – 3.5 hours
This is the total estimated time from preparing the work area to completing the raccoon removal process and cleaning up the area.
Essential Supplies
- Thick Leather Gloves: To protect your hands when handling the raccoons.
- Respirator: To protect yourself from inhaling dust and debris.
- Goggles: To protect your eyes from dust and debris.
- Raccoon Cage: A secure cage to place the raccoons in once they are removed from the crawlspace.
- Trash Bags: For cleaning up raccoon feces and any other debris.
Tools
- Flashlight: To illuminate dark areas inside the crawlspace.
- Crawlspace Access Tool: A tool to help you access and move around in the crawlspace.
- Catch Pole or Snare Pole: Tool to safely capture the raccoons without having to physically handle them
Challenges
The main challenges faced when removing raccoons from crawl spaces include:
- Limited Space: Crawlspaces are often very confined spaces which can make it difficult to move around and locate the raccoons.
- Poor Visibility: It can be very dark inside the crawlspace, making it hard to see the raccoons and any other hazards.
- Unsanitary Conditions: Crawlspaces often accumulate dirt, debris, and raccoon feces which can make it an unsanitary and unpleasant area to work in.
- Presence of Other Pests: There may be other pests present in the crawlspace, such as rodents or insects, which can pose additional challenges.
Step-by-Step Guide
- Prepare the Work Area:
- Remove any items from the area that may obstruct the removal process. Ensure that you have all necessary tools and protective equipment at hand.
- Locate the Raccoons:
- Use a high-powered flashlight or a headlamp to carefully inspect the crawlspace for signs of raccoons, such as feces, nesting materials, or food debris.
- Listen for sounds of movement or vocalizations that raccoons may make.
- Experts may use a borescope or an inspection camera to access and inspect hard-to-reach areas without having to physically enter the space.
- Remove the Raccoons:
- Carefully remove the raccoons from the crawlspace and place them in a raccoon cage.
- Use a catch pole or a snare pole to safely capture the raccoons without having to physically handle them.
- Clean the Area:
- Clean up any raccoon feces, urine, and other debris inside the crawlspace using a disinfectant cleaner to remove harmful bacteria and parasites.
- Remove and dispose of any contaminated insulation or other materials.
- Seal Entry Points:
- Inspect the outside of your house for any holes or cracks that the raccoons may have used to enter.
- Seal these entry points using steel mesh, hardware cloth, or cement to prevent raccoons and other pests from returning.
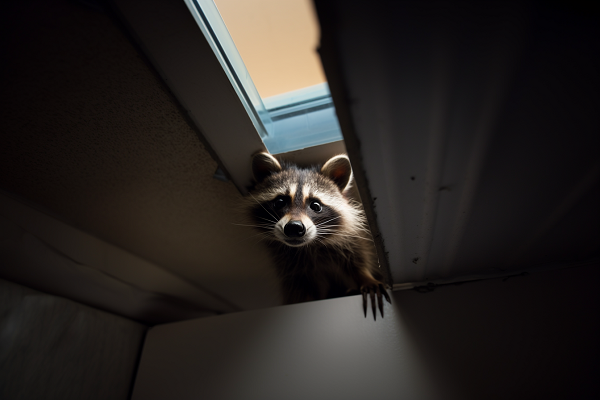
Removing Raccoons from Ceilings
Estimated Cost
The expense associated with raccoon removal from ceilings is subject to a variety of factors. If you decide to handle the situation yourself, you will need to account for the cost of necessary supplies and tools. Alternatively, hiring a professional will involve costs related to the intricacy of the job, which may include the quantity of raccoons, the nesting location, the construction of the ceiling, and any subsequent repairs or decontamination needed. For an accurate quote that reflects your unique circumstances, consult AAAC Wildlife Removal.
Prep Time: 30 minutes
This includes the time taken to gather all the essential supplies and tools, and preparing the work area by removing any items that may obstruct the removal process.
Perform Time: 1 – 3 hours
This is the estimated time it will take to locate the raccoons, remove them from the ceiling, and clean up the area.
Total Time: 1.5 – 3.5 hours
This is the total estimated time from preparing the work area to completing the raccoon removal process and cleaning up the area.
Essential Supplies
- Thick Leather Gloves: To protect your hands when handling the raccoons.
- Respirator: To protect yourself from inhaling dust and debris.
- Goggles: To protect your eyes from dust and debris.
- Raccoon Cage: A secure cage to place the raccoons in once they are removed from the ceiling.
- Trash Bags: For cleaning up raccoon feces and any other debris.
Tools
- Flashlight: To illuminate dark areas inside the ceiling.
- Ladder: To reach the ceiling.
- Drywall Saw: To make a hole in the ceiling if necessary.
Challenges
The main challenges faced when removing raccoons from ceilings include:
- Accessing the Ceiling: Ceilings are often difficult to access and may require a ladder or other equipment.
- Stability of the Ceiling: The ceiling may not be strong enough to support your weight, which can make it dangerous to work in.
- Electrical Wiring: There may be electrical wiring in the ceiling, which can pose a risk of electric shock.
- Locating the Raccoons: It can be difficult to determine exactly where the raccoons are located within the ceiling.
Step-by-Step Guide
- Prepare the Work Area:
- Remove any items from the area that may obstruct the removal process and set up a ladder if necessary. Make sure the ladder is stable and positioned correctly to avoid accidents.
- Locate the Raccoons:
- Use a high-powered flashlight or a headlamp to carefully inspect the ceiling for signs of raccoons, such as feces, nesting materials, or food debris.
- Listen for sounds of movement or vocalizations that raccoons may make.
- Experts may use a borescope or an inspection camera to access and inspect hard-to-reach areas without having to make a hole.
- Remove the Raccoons:
- Carefully remove the raccoons from the ceiling and place them in a raccoon cage.
- If it is necessary to make a hole in the ceiling, use a drywall saw to carefully cut a hole large enough to remove the raccoons. Be cautious of any electrical wiring and avoid cutting near those areas.
- Clean the Area:
- Clean up any raccoon feces, urine, and other debris inside the ceiling using a disinfectant cleaner to remove harmful bacteria and parasites.
- Remove and dispose of any contaminated insulation or other materials.
- Repair the Ceiling:
- If you made a hole in the ceiling to remove the raccoons, patch the hole with a piece of drywall and secure it with screws.
- Apply joint compound to the seams, sand the area smooth, and paint over it to match the rest of the ceiling.
- Seal Entry Points:
- Inspect the outside of your house and the attic for any holes or cracks that the raccoons may have used to enter.
- Seal these entry points using steel mesh, hardware cloth, or cement to prevent raccoons and other pests from returning.

Removing Raccoons from Roof
Estimated Cost
The cost associated with raccoon removal from roofs can be influenced by various elements. If you undertake the task yourself, you will need to consider the cost of the required supplies and tools. On the other hand, if you hire a professional, the cost will be associated with the complexity of the job, which could be affected by the number of raccoons, the location of the nest, the type of roof, and any necessary repairs or cleaning required afterward. For a precise quote tailored to your individual needs, please contact us.
Prep Time: 30 minutes
This includes the time taken to gather all the essential supplies and tools, and preparing the work area by removing any items that may obstruct the removal process.
Perform Time: 1 – 3 hours
This is the estimated time it will take to locate the raccoons, remove them from the roof, and clean up the area.
Total Time: 1.5 – 3.5 hours
This is the total estimated time from preparing the work area to completing the raccoon removal process and cleaning up the area.
Essential Supplies
- Thick Leather Gloves: To protect your hands when handling the raccoons.
- Respirator: To protect yourself from inhaling dust and debris.
- Goggles: To protect your eyes from dust and debris.
- Raccoon Cage: A secure cage to place the raccoons in once they are removed from the roof.
- Trash Bags: For cleaning up raccoon feces and any other debris.
Tools
- Flashlight: To illuminate dark areas on the roof.
- Ladder: To reach the roof.
- Roofing Hammer: To remove or fix any damaged shingles.
- Roofing Nails: To secure any loose shingles.
Challenges
The main challenges faced when removing raccoons from roofs include:
- Working at Heights: Working on a roof can be dangerous due to the risk of falling.
- Unstable Roofing Material: Some roofing materials may be loose or damaged, making it unsafe to walk on.
- Hidden Entry Points: Raccoons may have entered the roof through small holes or cracks that are not easily visible.
- Nesting Material: Raccoons may have built nests on the roof which can be difficult to remove.
Step-by-Step Guide
- Prepare the Work Area:
- Remove any items from the area that may obstruct the removal process and set up a ladder if necessary. Make sure the ladder is stable and positioned correctly to avoid accidents.
- Locate the Raccoons:
- Use a high-powered flashlight or a headlamp to carefully inspect the roof for signs of raccoons, such as feces, nesting materials, or food debris.
- Raccoons are nocturnal creatures, so it might be easier to spot them or their activities during the night.
- Remove the Raccoons:
- Carefully remove the raccoons from the roof and place them in a raccoon cage.
- Use a catch pole or a snare pole to safely capture the raccoons without having to physically handle them.
- Remove Nesting Material:
- Remove any nesting material that the raccoons have built on the roof.
- Use a rake or a broom to carefully remove the nesting material without damaging the roofing material.
- Repair the Roof:
- If there are any damaged or loose shingles, use a roofing hammer and roofing nails to secure them in place.
- Replace any shingles that are severely damaged or missing.
- Clean the Area:
- Clean up any raccoon feces and other debris on the roof using a disinfectant cleaner to remove harmful bacteria and parasites.
- Seal Entry Points:
- Inspect the roof and the attic for any holes or cracks that the raccoons may have used to enter.
- Seal these entry points using steel mesh, hardware cloth, or cement to prevent raccoons and other pests from returning.
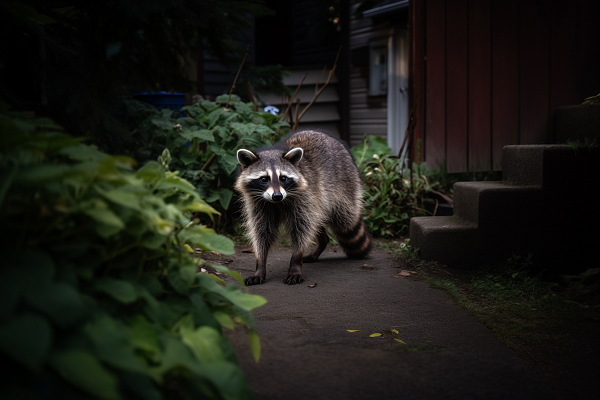
Removing Raccoons from Gardens & Yards
Estimated Cost
The cost of removing raccoons from gardens or yards can vary widely based on several factors. If you choose to address the issue yourself, there will be costs for the essential supplies and tools. However, if you decide to employ a professional, the cost will be influenced by different aspects such as the number of raccoons, the size of the area, the location of the nest, and any required repairs to the landscape or structures. To get a detailed quote specific to your case, get in touch with AAAC Wildlife Removal.
Prep Time: 15 minutes
This includes the time taken to gather all the essential supplies and tools, and preparing the work area by removing any items that may obstruct the removal process.
Perform Time: 1 – 2 hours
This is the estimated time it will take to locate the raccoons, remove them from the garden or yard, and clean up the area.
Total Time: 1.25 – 2.25 hours
This is the total estimated time from preparing the work area to completing the raccoon removal process and cleaning up the area.
Essential Supplies
- Thick Leather Gloves: To protect your hands when handling the raccoons.
- Respirator: To protect yourself from inhaling dust and debris.
- Goggles: To protect your eyes from dust and debris.
- Raccoon Cage: A secure cage to place the raccoons in once they are removed from the garden or yard.
- Trash Bags: For cleaning up raccoon feces and any other debris.
Tools
- Flashlight: To illuminate dark areas in the garden or yard.
- Garden Hose or Sprinkler: To deter raccoons from certain areas.
- Catch pole or a Snare pole: To safely capture the raccoons without having to physically handle them
Challenges
The main challenges faced when removing raccoons from gardens and yards include:
- Open Space: Gardens and yards are open spaces, making it difficult to corner and capture the raccoons.
- Presence of Food Sources: Gardens often have a lot of food sources for raccoons, which can attract more raccoons to the area.
- Multiple Hiding Places: Gardens and yards typically have multiple hiding spots like bushes, trees, or under decks, making it harder to locate and remove the raccoons.
Step-by-Step Guide
- Prepare the Work Area:
- Remove any items from the area that may obstruct the removal process.
- Locate the Raccoons:
- Use a high-powered flashlight or a headlamp to carefully inspect the garden or yard for signs of raccoons, such as feces, food debris, or tracks.
- Inspect common hiding spots like bushes, trees, or under decks.
- Remove the Raccoons:
- Carefully remove the raccoons from the garden or yard and place them in a raccoon cage.
- Use a catch pole or a snare pole to safely capture the raccoons without having to physically handle them.
- Remove Food Sources:
- Remove any food sources that may attract raccoons to the garden or yard. This includes pet food, bird feeders, and fallen fruits or vegetables.
- Clean the Area:
- Clean up any raccoon feces and other debris in the garden or yard using a disinfectant cleaner to remove harmful bacteria and parasites.
- Deter Raccoons:
- Use raccoon deterrents such as motion-activated lights or sprinklers.
- Install a motion-activated ultrasonic repellent that emits a high-frequency sound that is unpleasant to raccoons but inaudible to humans.
- Seal Entry Points:
- If your garden or yard is fenced, inspect the fence for any holes or cracks that the raccoons may have used to enter.
- Repair any damages to the fence and consider installing a motion-activated light or a motion-activated sprinkler near the fence to deter raccoons from approaching.
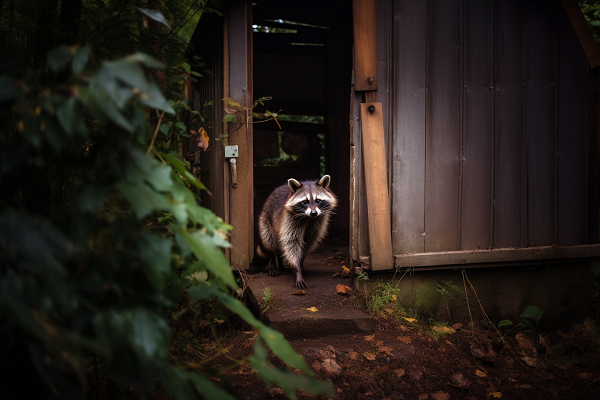
Removing Raccoons from Garages or Sheds
Estimated Cost
The expense of raccoon removal from garages or sheds can differ based on numerous considerations. Should you opt to manage the task yourself, you will incur costs for the necessary supplies and tools. If you choose to enlist a professional, the cost will be dictated by various factors including the quantity of raccoons, the position of the nest, the construction of the garage or shed, and any subsequent repairs or sanitation needed. For a comprehensive quote that reflects your particular situation, consult AAAC Wildlife Removal.
Prep Time: 15 minutes
This includes the time taken to gather all the essential supplies and tools, and preparing the work area by removing any items that may obstruct the removal process.
Perform Time: 1 – 2 hours
This is the estimated time it will take to locate the raccoons, remove them from the garage or shed, and clean up the area.
Total Time: 1.25 – 2.25 hours
This is the total estimated time from preparing the work area to completing the raccoon removal process and cleaning up the area.
Essential Supplies
- Thick Leather Gloves: To protect your hands when handling the raccoons.
- Respirator: To protect yourself from inhaling dust and debris.
- Goggles: To protect your eyes from dust and debris.
- Raccoon Cage: A secure cage to place the raccoons in once they are removed from the garage or shed.
- Trash Bags: For cleaning up raccoon feces and any other debris.
Tools
- Flashlight: To illuminate dark areas in the garage or shed.
- Broom or Rake: To help remove raccoon feces and other debris from the area.
Challenges
The main challenges faced when removing raccoons from garages and sheds include:
- Limited Space: Garages and sheds often have limited space, making it difficult to move around and remove the raccoons.
- Clutter: Garages and sheds are often cluttered with items, making it harder to locate and remove the raccoons.
- Potential for Aggression: Raccoons may become aggressive when cornered in a confined space like a garage or shed.
Step-by-Step Guide
- Prepare the Work Area:
- Remove any items from the area that may obstruct the removal process.
- Organize the clutter to create a clear path to access the raccoons without tripping or disturbing any items.
- Locate the Raccoons:
- Use a high-powered flashlight or a headlamp to carefully inspect the garage or shed for signs of raccoons, such as feces, food debris, or nesting material.
- Listen for sounds of movement or scratching that may indicate the presence of raccoons.
- Remove the Raccoons:
- Carefully remove the raccoons from the garage or shed and place them in a raccoon cage.
- Use a catch pole or a snare pole to safely capture the raccoons without having to physically handle them.
- Be cautious as raccoons may become aggressive when cornered.
- Clean the Area:
- Clean up any raccoon feces and other debris in the garage or shed using a disinfectant cleaner to remove harmful bacteria and parasites.
- Deter Raccoons:
- Use raccoon deterrents such as motion-activated lights or sprinklers to deter raccoons from returning to the garage or shed.
- Install a motion-activated ultrasonic repellent that emits a high-frequency sound that is unpleasant to raccoons but inaudible to humans.
- Seal Entry Points:
- Inspect the garage or shed for any holes or cracks that the raccoons may have used to enter.
- Repair any damages and reinforce any weak points to prevent raccoons from returning.
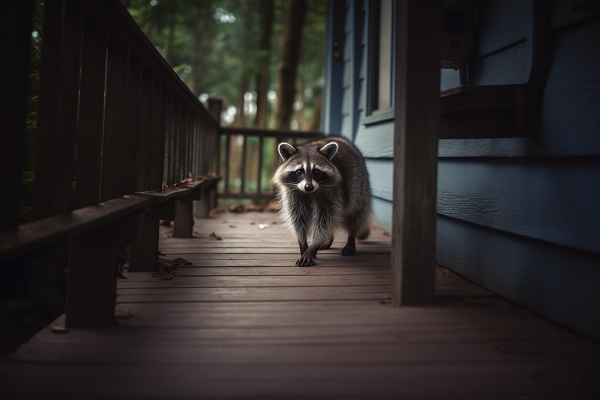
Removing Raccoons from Decks or Porches
Estimated Cost
The price for removing raccoons from decks or porches can fluctuate depending on multiple factors. If you decide to tackle the situation yourself, you will need to account for the cost of essential supplies and tools. Alternatively, if you decide to hire a professional, the price will be affected by several elements such as the number of raccoons, the location of the nest, the structure of the deck or porch, and any required repairs or cleaning afterward. To receive an accurate quote tailored to your specific circumstances, contact AAAC Wildlife Removal.-
Prep Time: 15 minutes
This includes the time taken to gather all the essential supplies and tools, and preparing the work area by removing any items that may obstruct the removal process.
Perform Time: 1 – 2 hours
This is the estimated time it will take to locate the raccoons, remove them from the deck or porch, and clean up the area.
Total Time: 1.25 – 2.25 hours
This is the total estimated time from preparing the work area to completing the raccoon removal process and cleaning up the area.
Essential Supplies
- Thick Leather Gloves: To protect your hands when handling the raccoons.
- Respirator: To protect yourself from inhaling dust and debris.
- Goggles: To protect your eyes from dust and debris.
- Raccoon Cage: A secure cage to place the raccoons in once they are removed from the deck or porch.
- Trash Bags: For cleaning up raccoon feces and any other debris.
Tools
- Flashlight: To illuminate dark areas under the deck or porch.
- Broom or Rake: To help remove raccoon feces and other debris from the area.
Challenges
The main challenges faced when removing raccoons from decks and porches include:
- Difficult to Access: The space under decks and porches is often narrow and difficult to access.
- Darkness: It is often very dark under decks and porches, making it difficult to locate and remove the raccoons.
- Potential for Aggression: Raccoons may become aggressive when cornered in a confined space like under a deck or porch.
Step-by-Step Guide
- Prepare the Work Area:
- Remove any items from the area that may obstruct the removal process, such as garden tools, pots, or furniture.
- Create as much space as possible to maneuver and safely remove the raccoons.
- Locate the Raccoons:
- Use a high-powered flashlight or a headlamp to carefully inspect under the deck or porch for signs of raccoons, such as feces, food debris, or nesting material.
- Listen for sounds of movement or scratching that may indicate the presence of raccoons.
- Remove the Raccoons:
- Carefully remove the raccoons from under the deck or porch and place them in a raccoon cage.
- Use a catch pole or a snare pole to safely capture the raccoons without having to physically handle them.
- Be cautious as raccoons may become aggressive when cornered.
- Clean the Area:
- Clean up any raccoon feces and other debris from under the deck or porch using a disinfectant cleaner to remove harmful bacteria and parasites.
- Deter Raccoons:
- Use raccoon deterrents such as motion-activated lights or sprinklers to deter raccoons from returning to the deck or porch.
- Install a motion-activated ultrasonic repellent that emits a high-frequency sound that is unpleasant to raccoons but inaudible to humans.
- Seal Entry Points:
- Inspect under the deck or porch for any holes or cracks that the raccoons may have used to enter.
- Repair any damages and reinforce any weak points to prevent raccoons from returning.
Conclusion
Raccoon removal is a necessary task to maintain a safe and healthy living environment. Raccoons can cause significant damage to your property and can carry diseases that are harmful to humans and pets.
This guide has provided you with an understanding of raccoon habits, the common areas they inhabit, and detailed instructions for removing raccoons from different locations in and around your home.
Maintaining a raccoon-free environment involves regular inspection of your property for signs of raccoon activity, sealing any potential entry points, and using deterrents to keep raccoons away. By following the steps outlined in this guide, you can successfully remove raccoons from your property and keep them from returning.
It’s essential to be proactive and address the problem as soon as you notice signs of raccoon activity. The sooner you can remove the raccoons and repair any damage they have caused, the better.


